
How to Clean an Oiled Parquet Floor and When to Re-Oil It
An oiled floor is looked after by feeding the finish rather than stripping it.

To clean an oiled parquet floor, vacuum or sweep off the grit, then wash it with a microfiber mop wrung out until barely damp and a soap made for oiled wood, which leaves a little protection behind each time. Never use a steam mop, standing water or all-purpose cleaners. Every few years, or when the wood starts to look dry, give it a thin coat of maintenance oil rather than sanding it.
That routine is for oiled floors only. A lacquered floor is cleaned differently and must never be oiled, so start by finding out which one you have. For the general routine that covers both, see how to clean a parquet floor, daily, weekly and yearly.
Is your parquet oiled or lacquered?
A lacquer is a film on top of the wood; an oil soaks into it. You can usually tell by looking and by a drop of water:
- Look at it in raking light. Lacquer often has an even sheen and you see a surface over the wood. Oil looks and feels like bare wood, matte to softly lustrous.
- Put a drop of water in a hidden corner. On lacquer it stays on the surface as a bead. On a dry oiled floor it slowly darkens the wood as it soaks in.
- Check the paperwork. The spec sheet or the fitter's invoice names the finish, and the maker's care instructions follow from it.
The difference matters because the products are opposites. A wood soap for oiled floors leaves a fine film of soap that a lacquered floor cannot absorb, so it smears. A cleaner made for lacquer does nothing to feed an oiled floor.

Droit, OscarOno Paris's straight oak board, is one of the lacquered floors: it comes in the twelve lacquered Essentiel colors, like the white finish of this beach house in South Beach, Miami. Floors like this follow the lacquered routine and are never oiled.
How do you wash an oiled parquet floor?
- Remove the grit first. Vacuum with a soft brush head and the beater bar off, or sweep with a soft broom. Grit under a wet mop scratches.
- Mix the soap. Dilute a soap made for oiled wood floors in lukewarm water, at the strength on the bottle. These soaps are based on natural fats that stay in the surface after washing.
- Use a flat microfiber mop. Wring it until it feels almost dry, or spray the solution lightly ahead of the mop. String mops and sponges hold far too much water.
- Mop along the grain. Work one area at a time, and leave no film of water behind.
- Let it dry before use. A barely damp floor dries in minutes; if it does not, you used too much water.
Once a week is enough for most homes, less in quiet rooms. Shops, restaurants and hotels wash more often, which is exactly why a soap that feeds the finish matters there.
What should you never use on oiled parquet?
- Steam mops. Heat and moisture driven into the wood draw out the oil and can swell the joints.
- A wet mop or a bucket of water. Water left standing soaks into the open pores and joints.
- All-purpose cleaners, dish soap, ammonia, bleach and vinegar. They are made to dissolve grease, and an oil finish is, in effect, grease in the wood.
- Silicone or wax shine products. They leave a layer that later stops fresh oil from soaking in.
- Abrasive pads and scouring powders. They scratch through the protection.
How do you clean an end grain parquet floor?
The same way, with less water still. End grain shows the open ends of the wood fibers, so it draws liquid in faster than a plank: wring the mop even drier, and wipe up spills at once. It is also made of many small pieces, so a soft brush head that reaches into the joints helps.
Opus, an endgrain oak floor, comes in Natural, Smoke and Black. In the Smoke finish the oak is smoked through its full depth, so a scuff does not reveal a pale layer underneath. Before buying a maintenance product for an endgrain floor, check the finish on its spec sheet and use the product made for that finish.
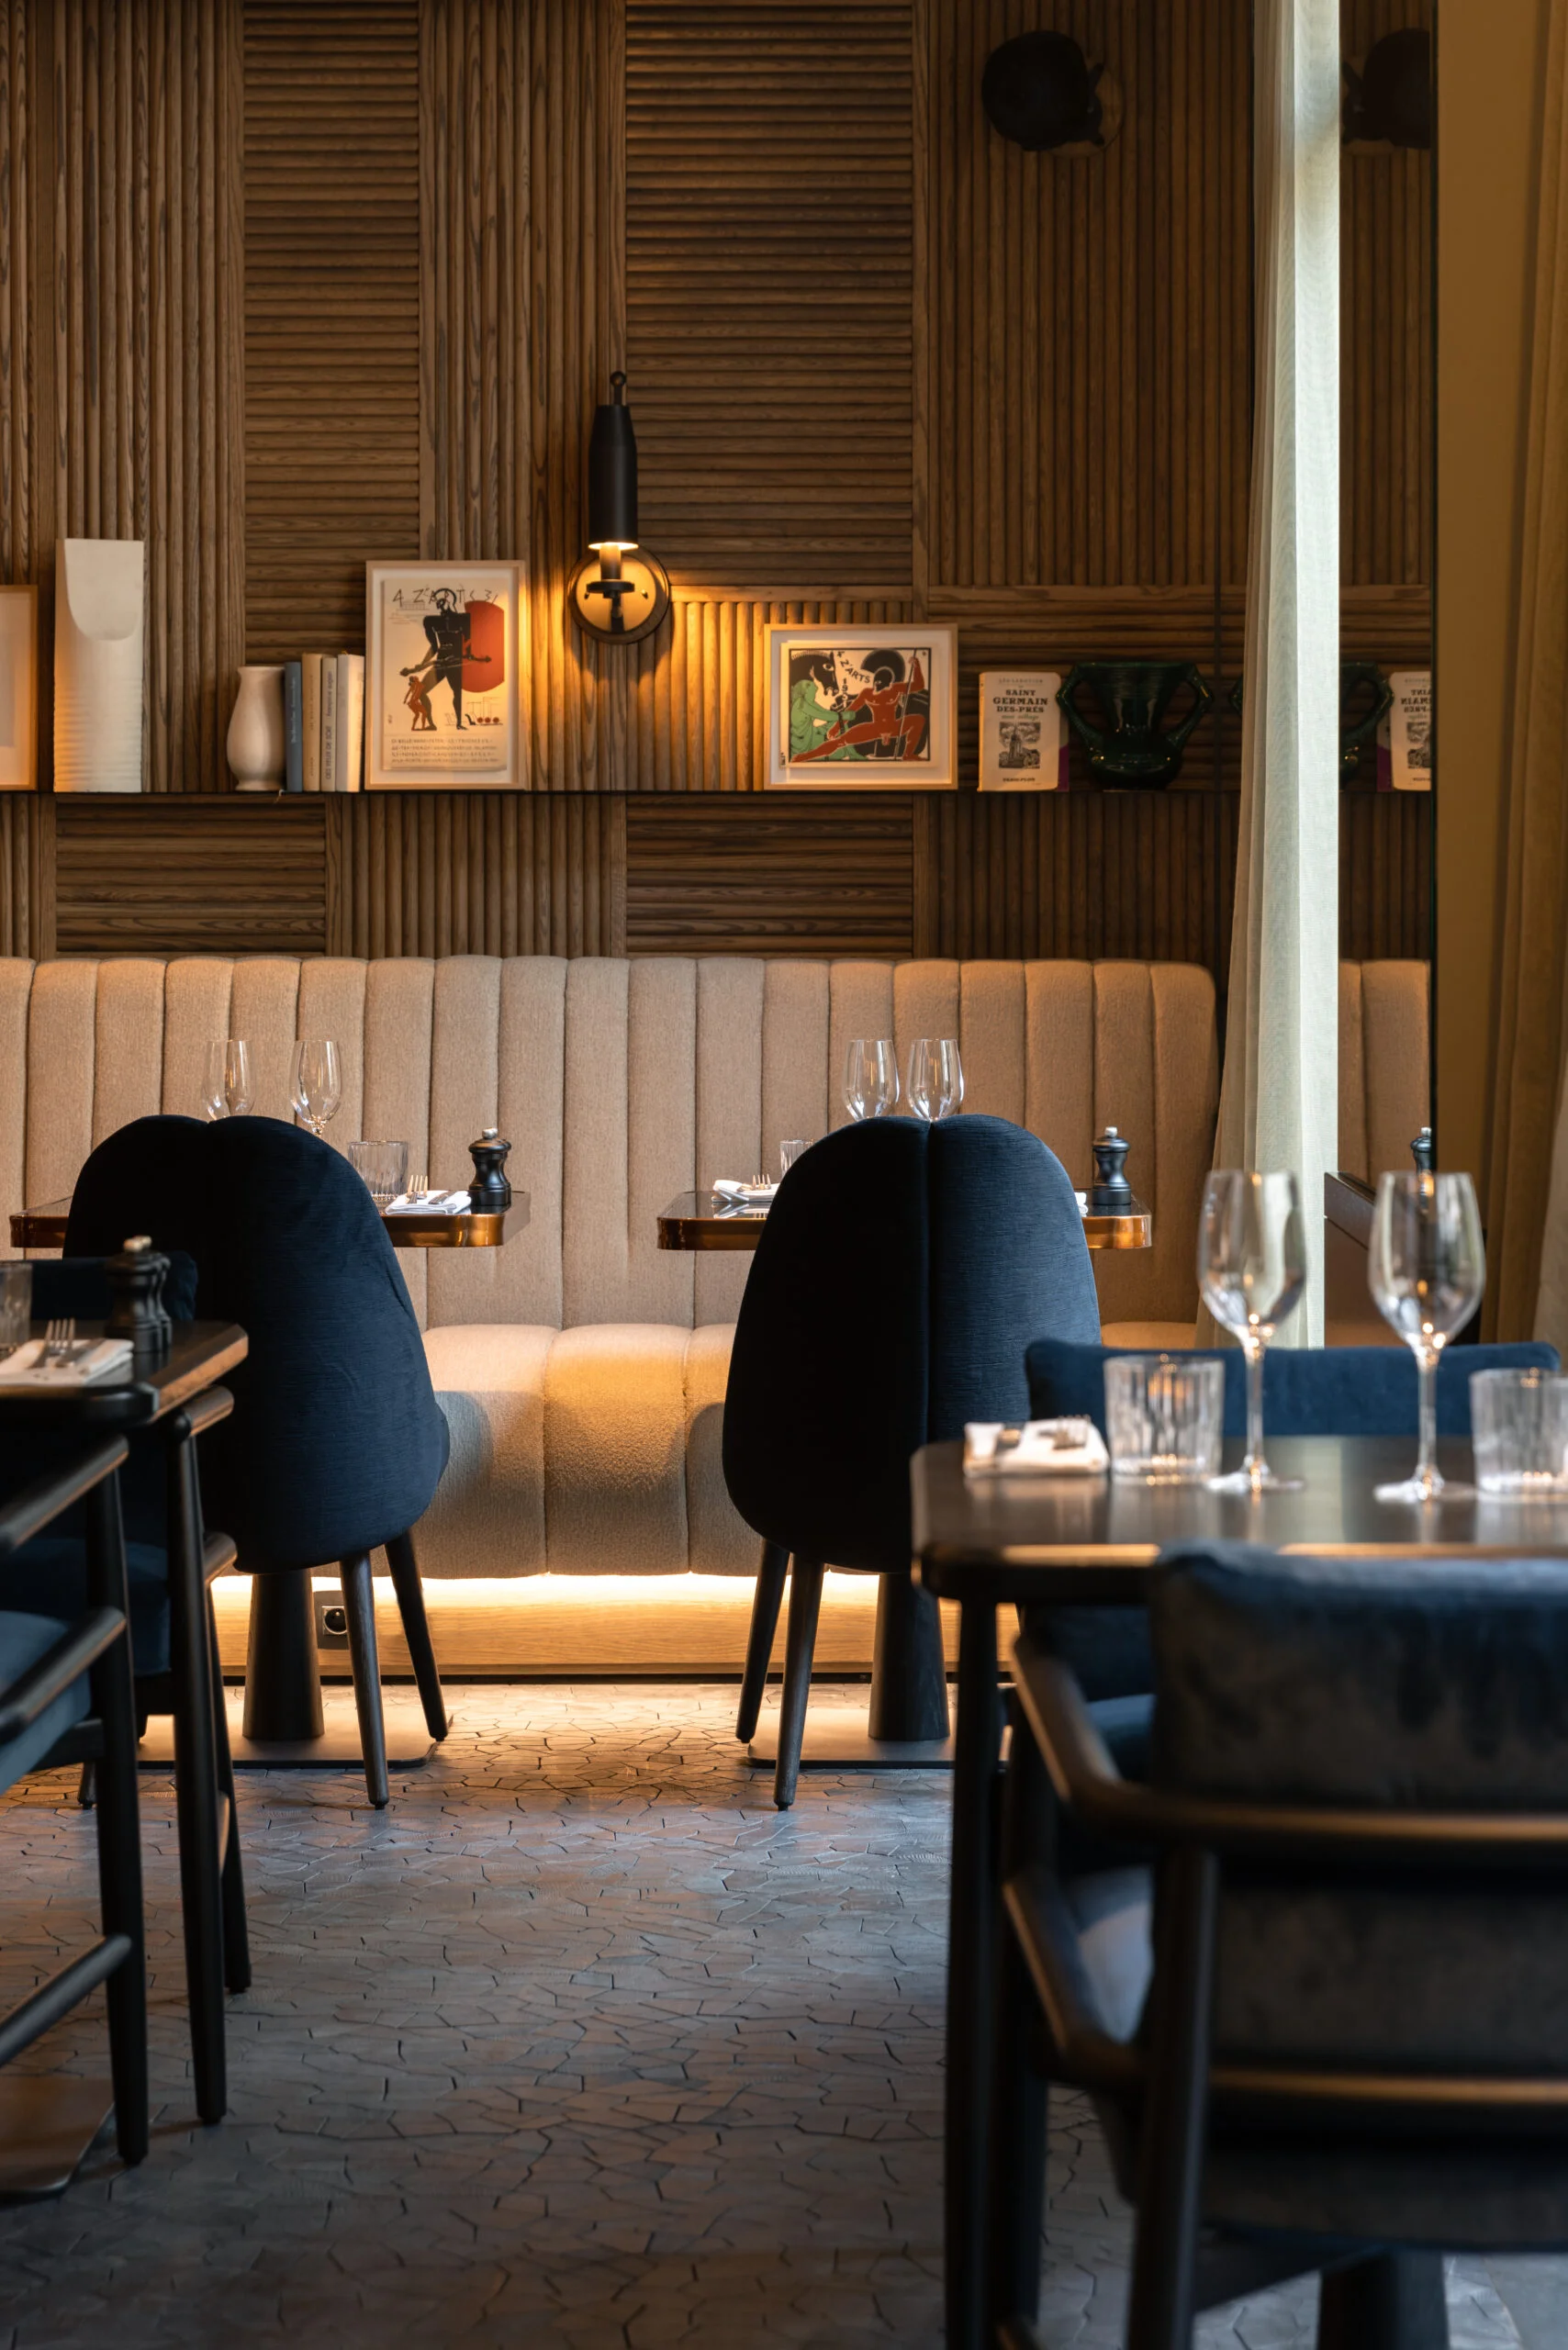
A restaurant floor takes crumbs and spills every day. In the restaurant of Hotel Dame des Arts in Paris, Opus in the Black finish runs under the tables; for a floor like this, rated usage class 34 for very heavy commercial traffic, a dry mop for crumbs and a barely damp one for spills is the day-to-day routine.
How do you re-oil a parquet floor?
Re-oil when the wood looks dry or pale in the traffic paths, or when a drop of water darkens the wood quickly instead of sitting on the surface. In a home that is usually every few years; in a busy shop or restaurant, more often. Always follow the instructions of the oil you use, because drying times differ from one product to the next.
- Deep clean. Wash with an intensive cleaner made for oiled floors to lift dirt and old soap.
- Let it dry completely. Oil will not soak into damp wood, and trapped moisture turns the finish cloudy.
- Apply a thin coat. Spread the maintenance oil sparingly with a pad or a floor buffer, working it into the traffic paths.
- Wipe off the excess. Buff with clean cotton cloths within the time the product gives. Oil left on the surface stays sticky and holds dirt.
- Let it cure. Keep traffic light and do not wash the floor until the oil has hardened.
Oily cloths can catch fire by themselves as they dry. Lay them flat outdoors or soak them in water before throwing them away.
How do you repair scratches and water marks on oiled parquet?
This is where an oiled floor earns its keep: most marks are repaired on the spot, without touching the rest of the room. A fine surface scratch often disappears with a drop of maintenance oil rubbed in with a cloth. For a deeper scratch or a stubborn mark, sand the spot lightly along the grain with fine sandpaper, wipe away the dust, oil it, wipe off the excess and buff it to match the floor around it.
A pale water ring usually means the oil has been washed out of that spot: an intensive cleaner and a little fresh oil bring it back. Dark gray or black marks are different. They form when water sits long enough to react with the natural tannins in oak, and they go deeper; a light local sanding may remove them, but a deep stain is a job for a professional.
Frequently asked questions
How do you clean an oiled parquet floor?
Vacuum or sweep off the grit, then wash with a flat microfiber mop wrung out until barely damp and a soap made for oiled wood floors. Mop along the grain, leave no water behind, and never use a steam mop or all-purpose cleaners.
Can you use wood soap on a lacquered floor?
No. Soaps for oiled floors leave a fine film of fat that an oiled floor absorbs but a lacquered floor cannot, so it smears and attracts dirt. Use a pH-neutral cleaner made for lacquered wood, and never oil a lacquered floor.
When does an oiled floor need re-oiling?
When the wood looks dry or pale in the traffic paths, or when a drop of water darkens it quickly instead of sitting on the surface. In a home that is usually every few years; busy commercial floors need it more often.
How do you remove water marks from oiled parquet?
A pale ring usually means the oil has been washed out: clean the spot with an intensive cleaner for oiled floors and rub in a little maintenance oil. Dark gray or black marks have reacted with the tannins in the oak and go deeper; light local sanding may remove them, otherwise call a professional.
How can you tell if a parquet floor is oiled or lacquered?
Put a drop of water in a hidden corner. On lacquer it stays on the surface as a bead; on a dry oiled floor it slowly darkens the wood as it soaks in. Lacquer also tends to show an even sheen, while oil looks and feels like bare wood.
Caring for an OscarOno Paris floor
Know your finish before you buy a cleaning product. The Essentiel floors, including Droit, are lacquered in twelve colors and follow the lacquered routine. The endgrain floors, including Opus, come in Natural, Smoke and Black; the spec sheet for each collection, with CAD and 3D files, is in the library. To see a finish in your own light before you choose, order samples.
More from the Atelier
Protecting End Grain Wood Block Flooring from UV Fading
Discover the science of oak photodegradation and how to protect end-grain wood floors from UV fading using advanced varnishes and architectural design.

Parquet Floor Restoration: Is an Old Parquet Floor Worth Saving?
Loose blocks, gaps, stains and a worn finish can all be put right. How to tell whether an old parquet floor is worth restoring, what the work involves, and when it is not.

Squeaky Wood Floors: Why They Squeak and How to Fix Them
A squeak is friction: wood on wood, wood on a nail, or a subfloor moving on its joists. Find which one it is and the fix follows.